
King Pigeon Pose (Eka Pada Rajakapotasana) – The Ultimate Guide
Posted by Paul Zaichik on

King Pigeon Pose (Eka Pada Rajakapotasana) – The Ultimate Guide
Learn How To Perfectly Master The Challenging King Pigeon Pose Step by Step
King Pigeon pose (Eka Pada Rajakapotasana) is one of Yoga's super poses!
King Pigeon pose is one of Yoga super poses. This pose can truly be called the full body pose because it targets many muscles, and opens many different joints and areas of the body. This pose often looks intimidating to the beginner, but like all other yoga poses, it can be broken down into preparatory exercises and mastered successfully.
In this article, you will learn everything you need to know about Eka Pada Rajakapotasana.
In this article, you will learn everything you need to know about Eka Pada Rajakapotasana.
- What exactly you need to do to be able to do the King Pigeon pose successfully.
- Step by step guide on how to do this pose.
- Which muscles work in this pose
- What's really holding you back from being able to do this pose and how to fix it!
Kinesiology of King Pigeon Pose - Eka Pada Rajakapotasan (Muscles worked in this pose)

Extensors of the Shoulder in King Pigeon Pose
All the extensors of the shoulder are worked in king pigeon pose. If you're not familiar with the anatomy and kinesiology, the extensor muscles are the ones that bring the arm from overhead position and down. So, to bring the arm over your head these muscles need to be flexible and well stretched. Fortunately, EasyFlexibility system allows you to target the muscles one at a time so that each one is stretched individually and is of proper length for any pose, including king pigeon pose.
To make sure that you have proper mobility in your shoulder joint for the Eka Pada Rajakapotasana, you need flexibility in:
To make sure that you have proper mobility in your shoulder joint for the Eka Pada Rajakapotasana, you need flexibility in:
- Pectoralis major sternal part.
- Long head of the triceps.
- And of course, if you're going to bend your elbow very far, you would need flexibility in two short heads of your triceps as well.

Elbow Extensors in the King Pigeon Pose
For the elbow, you will need flexibility in your:
- Teres Major
- Posterior Deltoid
- Latissimus Dorsi.
Besides having the flexibility in your shoulder extensors in order to bring your arm overhead, you need to have flexibility in the muscles of your scapula.

Scapula Muscles in King Pigeon Pose
If these scapula muscles are not flexible they will restrict overhead movement. Scapula muscles restricting overhead movement are:
- Pectoralis minor
- Rhomboid major
If any of these muscles, either of the scapula or shoulder joint are not flexible you will not be able to bring your arm up. This is very important. So being able to stretch the muscles individually leads to much faster flexibility gains than trying to stretch them all together at the same time. In this case bringing the arm up and behind the head and stretching all the muscles together.

Front Leg King Pigeon Pose Medial Rotators
Let's talk about the front leg in the King Pigeon Pose. For the front leg, there is little rotation. Medial rotators have to be stretched for you to be able to rotate your leg out and place the whole outside of the top and bottom leg on the floor comfortably. Here you need flexibility primarily in your:
- Gluteus Medius
- Gluteus Minimus
- Piriformis
If you have very tight adductors, especially Adductor Magnus, you will need flexibility there to. There are other medial rotators,
for example, Tensor fasciae latae, but the flexibility of that muscle does not come into play here because the muscle stretches when the leg is extended or is behind you. Here the leg is in front of you and thus the muscle doesn't restrict it.
for example, Tensor fasciae latae, but the flexibility of that muscle does not come into play here because the muscle stretches when the leg is extended or is behind you. Here the leg is in front of you and thus the muscle doesn't restrict it.
So you see its several muscles need the flexibility here as well. What is interesting to note is that people who have tighter muscles on the outside of the front leg will try to move the leg to the outside. And people who have tighter muscles on the inside, the inner thighs will try to move the leg more inward when performing this pose.
Back Leg King Pigeon Pose

Back Leg King Pigeon Pose Hip Flexors
Next we have the rear leg in the King Pigeon Pose. Here all the flexors of the hip are involved. There are six of them.
There are six hip flexors. They are:
There are six hip flexors. They are:
- Pectineus
- Tensor Fasciae Latae
- Rectos Femoris
- Sartorius
- Soleus
- Iliacus
Tightness in any one of these muscles, just one, will prevent you from extending the leg back. Additionally, all the adductors flex the hip and thus tightness in any one of them will prevent the extension of the hip at your knee joint.

Back Leg King Pigeon Pose Adductors
There are four adductors. They are:
- Adductor Magnus
- Adductor Longus
- Adductor Brevis
- Gracilis

Back Leg King Pigeon Pose Quadriceps
The three short heads of your quadriceps can prevent the flexion of the knee in addition to the Rectus femoris which is also a hip flexor.
There are three short heads of quadriceps. They are:
There are three short heads of quadriceps. They are:
- Vastus Medialis
- Vastus Lateralis
- Vastus Intermedius
It seems like we've covered all the muscles and joints involved in the Eka Pada Rajakapotasana, but we're not done yet!
Most people who have tightness in their shoulders or in their hips will greatly compensate for lack of flexibility in these areas with their spine by hyper extending the spine to get the body vertical and to bring the arms back. In order not to compensate many muscles need to be flexible here as well such as Rectus Abdominis, the Obliques and Psoas Minor (if you have it that is) not everyone has Psoas Minor.
If you are looking to master the King Pigeon Pose, you are probably overwhelmed by the sheer number of muscles that are involved in this pose and are not sure where to start. The good news is that it is possible to isolate and stretch the muscles that are preventing you from doing the King Pigeon Pose one at a time with the Zaichik (Kinesiological) Stretching Techniques. Today we will show you a few of the ZST's (Zaichik Stretching Techniques) that will help you to improve your Eka Pada Rajakapotasana, and overall help you get more flexible fast. But first lets do a few tests to see where you lack flexibility in your body, and which muscles are preventing you from being able to do the King Pigeon Pose.
Try these tests to see where you lack flexibility for the King Pigeon Pose
Now that you know how many muscles and joints are involved in the Eka Pada Rajakapotasana pose it's time to actually test your body to see where the weak areas are and work on them. You may need help with just your shoulders. Or just your front hip. Or just your back hip. Or maybe the problem is in your spine. Maybe you need help with two or three out of the four. Below, you will find simple tests to see the flexibility in those four areas. Once you know where your problem areas are you will then be able to work on your flexibility by isolating each of the areas using the Zaichik Stretching Techniques.

Shoulder Flexibility Test for the King Pigeon Pose
To do this test:
- Stand with your back to the wall.
- Do not allow your lower back to arch
- Keep your lower back in contact with the wall
- Bring your straight arms directly over your head.
- Note: That on the picture you see a demonstration of the curve that SHOULD NOT be there. Your goal is press with your flat back against the wall so that the curve demonstrated is avoided. When you feel your back completely touching the wall only then raise your arms and try to touch the wall behind you with your wrists to see your true shoulder flexibility.
When your back is as against the wall and your arms are up, if your lower back is arched as you see demonstrated in the picture, this means that you are compensating with your back for lack of shoulder flexibility. Our Overhead Shoulder Flexibility program will help you.
Are you able to touch the back of your wrists with straight arms to the wall?
If the answer to this question is yes, then it means that you have good shoulder flexibility. Of course you can get even more flexible in your shoulders if you wish with our Overhead Shoulder Flexibility program, but you have enough flexibility for this pose.
If the answer to this question is no, then it means that you need to work on your shoulder flexibility and our Overhead Shoulder Flexibility program will help you improve your shoulder flexibility very fast.

Front Leg Flexibility Test for the King Pigeon Pose
Next lets check if you have enough flexibility in the front leg for this pose.
To do this test:
To do this test:
- Lie down on your back
- Keep both legs straight
- Lift one leg up
- Flex the hip to ninety (90) degrees
- Flex the knee to 90 degrees
- Rotate the leg out
Can you rotate the leg out so that your shin is parallel to your body?
If the answer to this question is yes, then you have about enough flexibility for King Pigeon Pose. However, if your front leg will need to compensate for your back leg, it's ideal for you to be able to bring your thigh toward your in the externally rotated position and make contact with your thigh to your torso. It is not required, but will make the pose a lot easier to perform and remain in. If you're not able to do it, please take a look at the lotus pose, which will help you with the flexion of your hip in externally rotated position.
If the answer to this question is no, then you do not have enough flexibility for the pigeon pose. If, while lying on your back, you are not able to flex your leg with an internal rotation and bring it over your body so that your knee is at least over your stomach or better yet, over your chest. Then the Lotus Program will help. Alternatively, a Glutes & Iliotibial Band program will help.

Spine Flexibility Test for the King Pigeon Pose
Next let's check the ability of your spine to hyper extend. It is very rare for people to have flexible enough hip flexors and extension of the rear leg in the King Pigeon pose, not to compensate with the lower back.
To do this test:
To do this test:
- Lie down on the floor.
- Place your hands under your shoulders.
- Press up into the cobra position.
- You want your hips to remain on the floor. If you were to place your hand just below your belly button and move your hand out to the side you will encounter bones on the side of your stomach. Those bones (iliac bones) should stay on the floor.
- Press up and see if you can bring your chest, aiming directly forward. In other words, your sternum should be vertical. This is a minimum flexibility that you need in your spine for the King Pigeon Pose.
Can you do the cobra position?
If the answer is yes, then you have the minimum flexibility required to do the King Pigeon Pose.
If the answer is no, and you are not able to do the cobra with your chest facing forward and your hips on the ground, our Back Extension (Back Bending) Program would be very helpful.
If the answer is yes, then you have the minimum flexibility required to do the King Pigeon Pose.
If the answer is no, and you are not able to do the cobra with your chest facing forward and your hips on the ground, our Back Extension (Back Bending) Program would be very helpful.
Hip Extension of the leg in the King Pigeon Pose
As far as the fourth component, which is the hip extension of the leg. It's a safe bet that you do not have enough flexibility in your hip flexors and in your abductors to extend your leg. This is not even something that needs to be tested. The reason for that is because the muscles are usually very tight. As I mentioned earlier, there are six hip flexors and four adductors. If someone has enough flexibility in these muscles, that person is probably so well trained that they can easily perform the King Pigeon Pose and would not even be reading this article. Alternatively, someone may even be able to perform the king pigeon pose due to flexibility in the spine, front leg and the shoulders and still have tight hip flexors. I have seen that many times as well. And. Basically, everyone who cannot do a king pigeon would need a Hip Flexors program.
So once, you know, where you have the tightness, you can either use the EasyFlexibility programs for each one of the four areas:
So once, you know, where you have the tightness, you can either use the EasyFlexibility programs for each one of the four areas:
Or you can use standard yoga preparatory poses, which usually will take a longer period of time because there is no muscle isolation and there is no focus on the tight muscles in those groups. If, however, you would still rather do the yoga poses to prepare for the King Pigeon Pose further down below you will find a list of Yoga poses that you can do.
Zaichik Stretching Techniques - Unique Flexibility Exercises to help you with your problem areas so that you can master the King Pigeon Pose
~Stability~ ZST (Psoas)
The following Zaichik Stretching Technique (ZST) is taken from the EasyFlexibility Hip Flexors Program. This ZST works on the famous Psoas muscle.
To perform ~Stability~ ZST:

Starting Position
- Get into a lunge position
- Right leg in front
- Bring the left arm up and flex laterally to the right
- Place the right hand on the floor or on a prop

Leverage 1
- Move the hips to the right

Target 1
- As the hips are coming back to the left move the pelvis forward and down.

Leverage 2
- Move the hips to the right

Target 2
- As the hips are coming back to the left move the pelvis forward and down.

Leverage 3
- Move the hips to the right

Target 3
- As the hips are coming back to the left move the pelvis forward and down.
~Discernment~ ZST (Flexors of the Core)
The following Zaichik Stretching Technique (ZST) is taken from the EasyFlexibility Back Bending Beginner Program. This ZST works on flexors of the core.
To perform ~Discernment~ ZST:

Starting position:
- Lie down flat on your stomach
- Place your hands under your shoulders
- Lift the torso up by pressing into the floor

Leverage 1
- Contract the spinal extensors and the flexors of the hip if necessary
- Hyperextend the lower back by lifting the hips off the floor

Target 1
As the hips are coming back down to the starting position press up a little bit higher.

Leverage 2
- Contract the spinal extensors and the flexors of the hip if necessary
- Hyperextend the lower back by lifting the hips off the floor

Target 2
As the hips are coming back down to the starting position press up a little bit higher.

Leverage 3
- Contract the spinal extensors and the flexors of the hip if necessary
- Hyperextend the lower back by lifting the hips off the floor

Target 3
As the hips are coming back down to the starting position press up a little bit higher.
Please note that what we've shared with you is only 2 ZST's from the EasyFlexibility system of over 100 programs. To get full benefit for your King Pigeon Pose we recommend various programs to help you so that you can target areas that are restricting you from doing a full King Pigeon Pose. To learn more about our programs please click here.
Yoga poses to prepare for the King Pigeon Pose
Let's take a look at the yoga poses traditionally used to build up to King Pigeon Pose. Again, keep in mind that this way of training for a King Pigeon Pose will take you much longer to do than training with the Zaichik Stretching Techniques.

Supported Fish Pose (Supported Matsyasana)
Stretch your abdomen, chest, throat and hip flexors with Supported Fish Pose!
- Begin by sitting with your back in front of a block, or blanket stack.
- Position your pelvis 8-10 inches in front of the block before slowly leaning back to rest your ribs against its edge.
- Open your chest and torso while keeping your arms by your side.
- Remain in this pose for at least 30 seconds to reap its maximum benefits.
- For an extra shoulder stretch, extend your arms towards the ceilings.
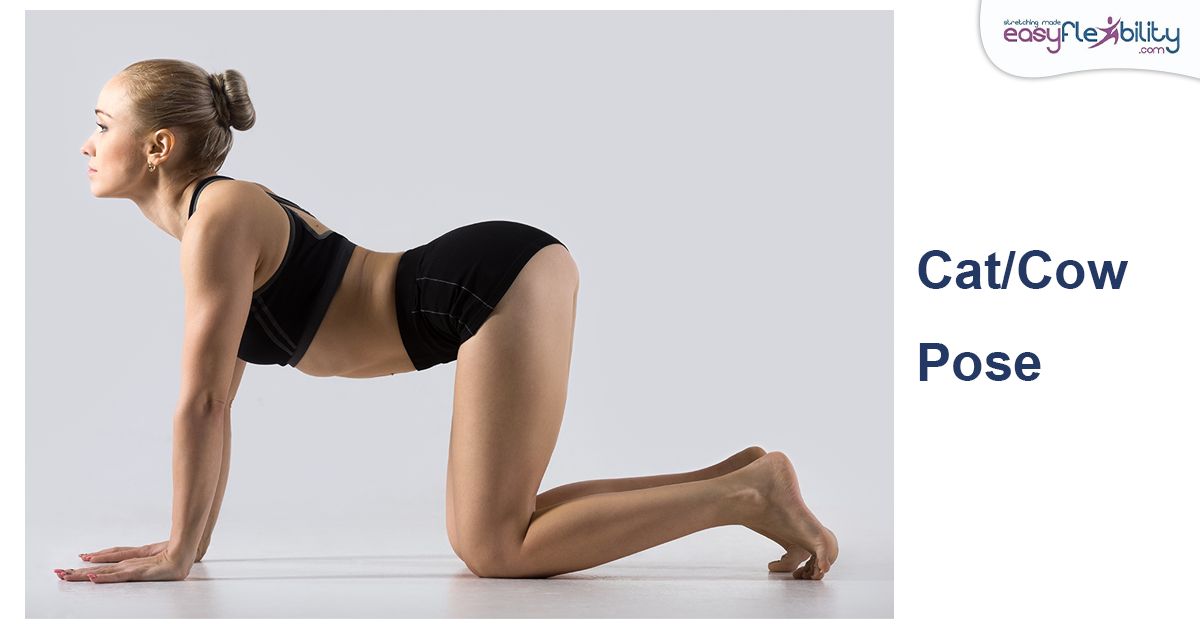
Cat/Cow Pose (Marjariasana)
Cat Cow Pose is a powerful preparation exercise that tones abdominal muscles, increases spinal flexibility and strengthens the arm, wrist and shoulder muscles for the King Pigeon pose.
- To perform it, begin with Cow Pose; inhale and drop your abdomen towards the ground while lifting your chest and chin towards the ceiling.
- Broaden your shoulders blades away from your ears and draw your stomach towards the spine while arching your back towards the ceiling.
- Let go of the crown of your head to create an unimpeded flow throughout the spine.
- Do this sequence at least 5-10 times and extend into 30 seconds staying pose before extending arms above you if you want to open up more in shoulders.
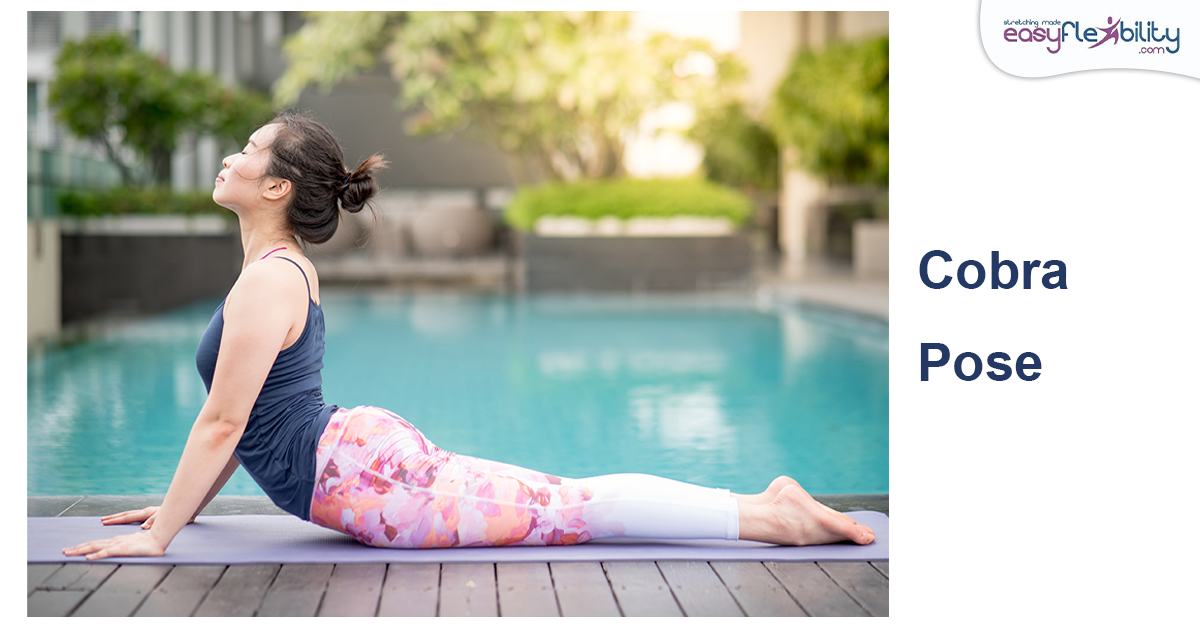
Cobra Pose is an energizing yoga pose that strengthens your spine, tones your buttocks and opens up your heart. This pose can also relieve fatigue and soothe lower back pain.
- To get into the Cobra Pose, start on your stomach with your palms flat on the floor underneath your shoulders.
- Bend at the elbows while keeping them close to your sides and look downwards maintaining a neutral neck alignment.
- As you inhale, lift your chest off the ground by rolling back through your shoulders while keeping the lower rib cage down on the mat.
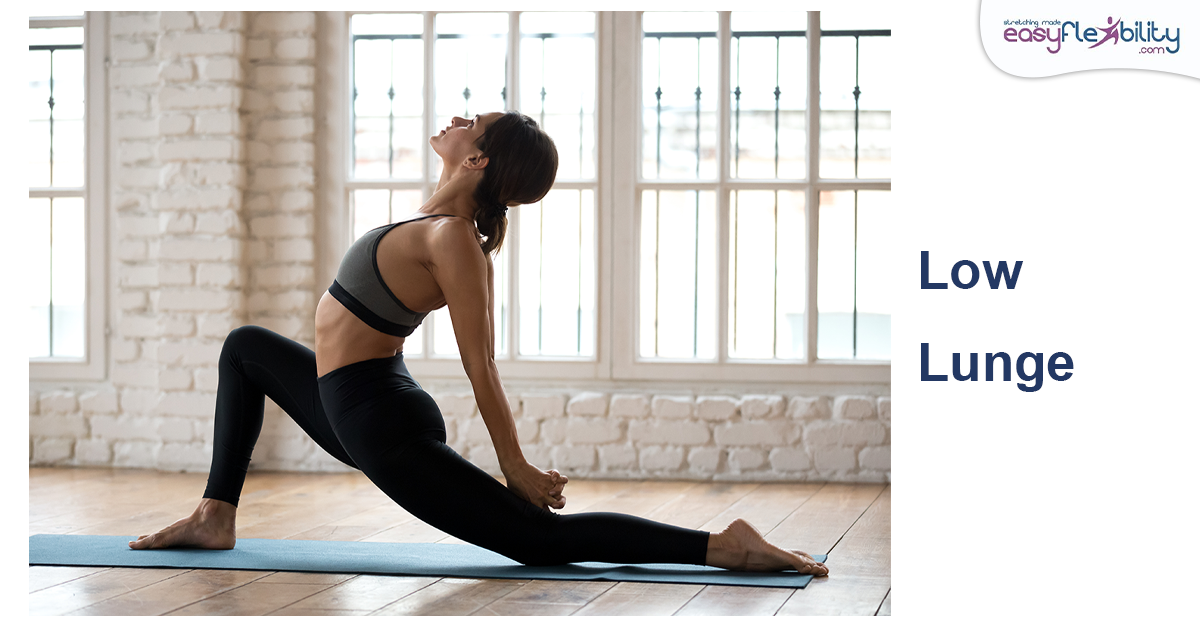
Lowe Lunge
Low Lunge is an essential pose for stretching your lower body and increasing flexibility in the hips, hamstrings, and quads. You’ll strengthen your knee joints too, with Low Lunge helping as a prep pose for the King Pigeon. Regular practice of Low Lunge can also enhance mental concentration by reducing tension in the body.
- To do a lunge, start by placing your left foot forward and square off your hips.
- Then bend your right knee so that it is over your heel, lower it to the floor and keep your left knee firm.
- As you inhale, bring your arms up to shoulder height at a 90-degree angle from the floor and sweep them out to your sides. This will help you deepen the stretch in your right thigh and groin area.
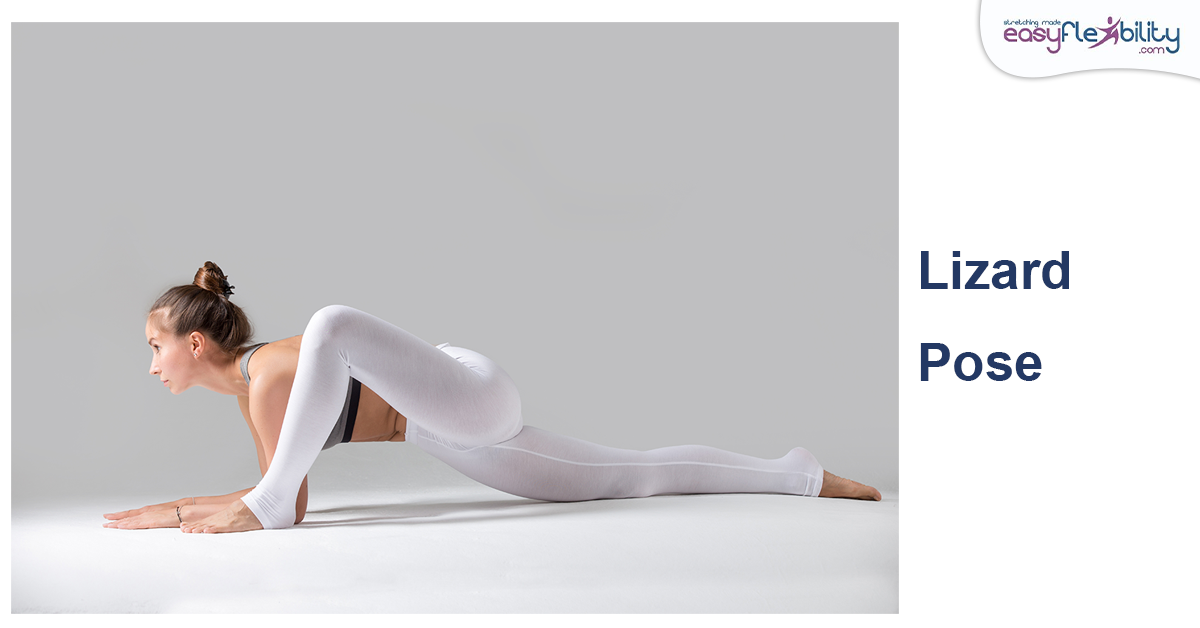
Lizard Pose (Utthan Pristhasana)
Lizard Pose, also known as Utthan Pristhasana in sanskrit, is a floor posture that combines opening the hips with strengthening the inner thighs and stretching out the hamstrings. It also helps create space in the neck, shoulders and chest so that you can move deeper into poses such as King Pigeon. Here's how to get into this yoga posture:
- To start the Lizard Pose, begin from a Downward-Facing Dog position with your feet hip-width apart.
- To practice lizard pose, start by tucking your chin into your chest and stepping your right foot forward so that you are in a low lunge position.
- Then, lower your left knee to the floor and press into your hips while keeping your arms straight.
- Lower onto your forearms slowly while making sure to keep your spine and head in alignment.
- To deepen the stretch, press up on the ball of your left foot while keeping it straight.
- Hold this pose for a few seconds before switching sides and repeating the practice.
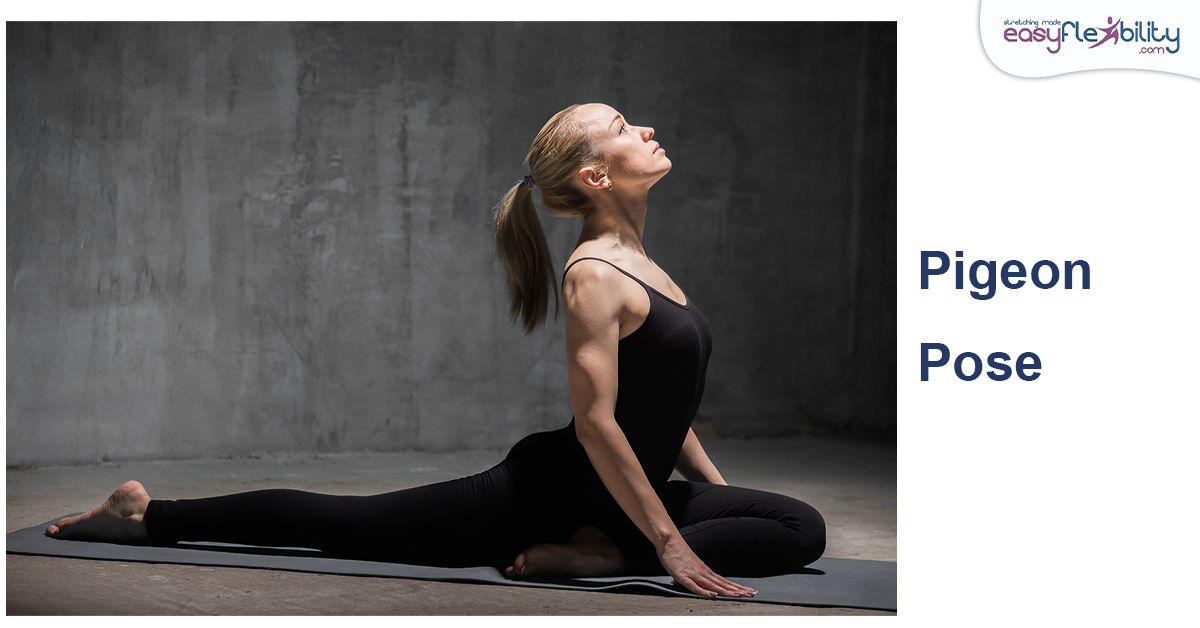
Half Pigeon Pose (Ardha Kapotasana)
Pigeon Pose is a highly beneficial stretching exercise designed to stimulate the muscles and joints in your lower back, hips, and hip flexors. Additionally, this pose offers great abdominal engagement which helps improve its digestive functions. Regularly performing the Pigeon pose also prepares your body for the more challenging King Pigeon pose.
- To practice Pigeon Pose, begin from a resting position on the floor.
- You should aim to keep your hips parallel and squared with the ground.
- Bend your front knee in a 90-degree angle and make sure that your foot is close to the groin area.
- Straighten your back leg and make sure that your back foot is firmly pressed into the mat.
- Stretch out your ribcage and open up your heart center while pressing your fingers into the earth by your side body.
- Keep lifting your gaze forward as you remain in this posture.
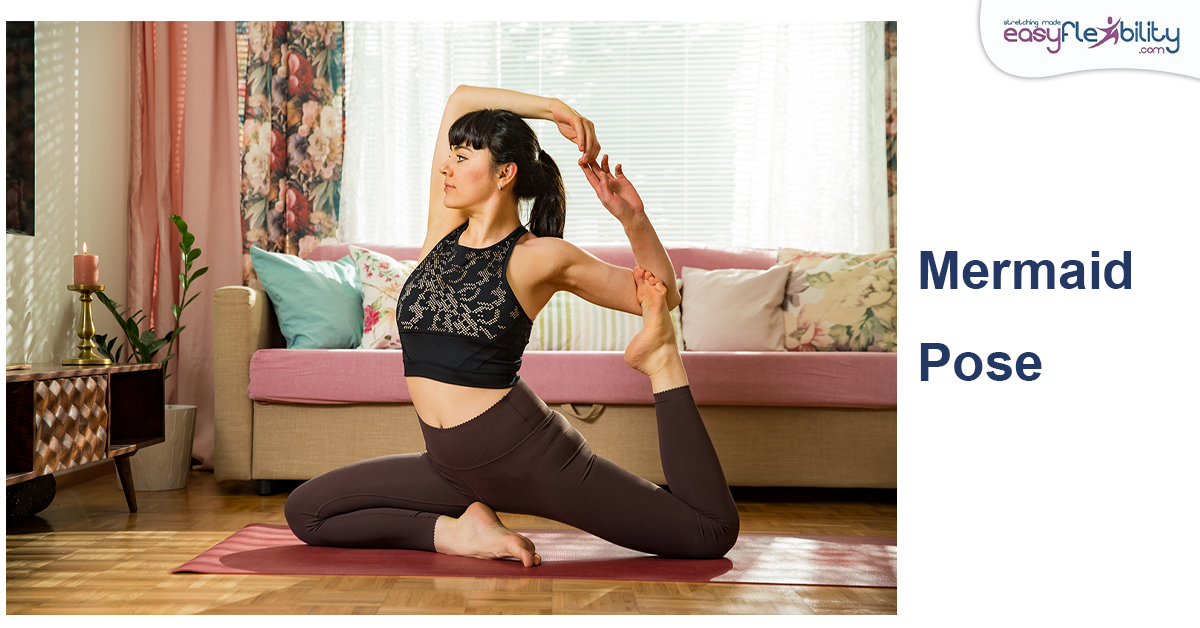
Mermaid Pose
Mermaid Pose is a great preparatory posture for the more difficult King Pigeon Pose. By performing this position, you'll improve your core strength, pelvic floor strength, flexibility in your lower back and hips, better balance and enhanced muscle tone in your chest and shoulders. To do Mermaid Pose, follow these steps:
- To get into the Mermaid Pose, start by setting up the Pigeon Pose on your right side.
- Align your shoulders and hips towards the mat, pressing your palms firmly against the surface.
- Bend your left knee, bring it close to your body, and then extend your left arm forward.
- When you feel ready, gently rotate your shoulder to grab hold of your left foot with your hand.
- As you tighten your grip around it, it helps deepen the stretch in that area - so take a deep breath and stay in this pose for a few moments!
About the Author:
Paul Zaichik is an Exercise Science Expert, author of multitude of books, and the creator of Zaichik Stretching Technique (formely known as Kinesiological Stretching Technique). His speciality is flexibility training as well as body weight conditioning. His innovative method is designed to have maximum carry over into specific athletic techniques. Paul is the author of books and DVD’s on the topic of flexibility, martial arts and bodyweight training. Over the years, Paul Zaichik has worked with a variety of individuals including athletes, entertainers, and military personnel. His ElasticSteel Method of Athletic Conditioning programs, EasyFlexibility Programs and Zaichik Stretching Techniques are used world wide by both professional and amateurs with great success.
© ElasticSteel Corp., EasyFlexibility, Paul Zaichik, et. El., 2023. No part of the materials available through ElasticSteel.com, EasyFlexiiblity.com, site may be copied, photocopied, reproduced, translated or reduced to any electronic medium or machine-readable form, in whole or in part, without prior written consent of Paul Zaichik EasyFlexibility.com, Elasticsteel.com.. Any other reproduction in any form without the permission of Paul Zaichik EasyFlexibility.com, Elasticsteel.com is prohibited. All materials contained on this site are protected by United States copyright law and may not be reproduced, distributed, transmitted, displayed, published or broadcast without the prior written permission of Paul Zaichik, EasyFlexibility.com, Elasticsteel.com.
You might also like...

From Anatomy to Asana: How Pectoralis Minor Influences Gormukhasana in Yoga
Unlocking the Secrets of Pectoralis Minor: Its Role in Yoga's Gomukhasana
When diving into the world of yoga, unde...
Read More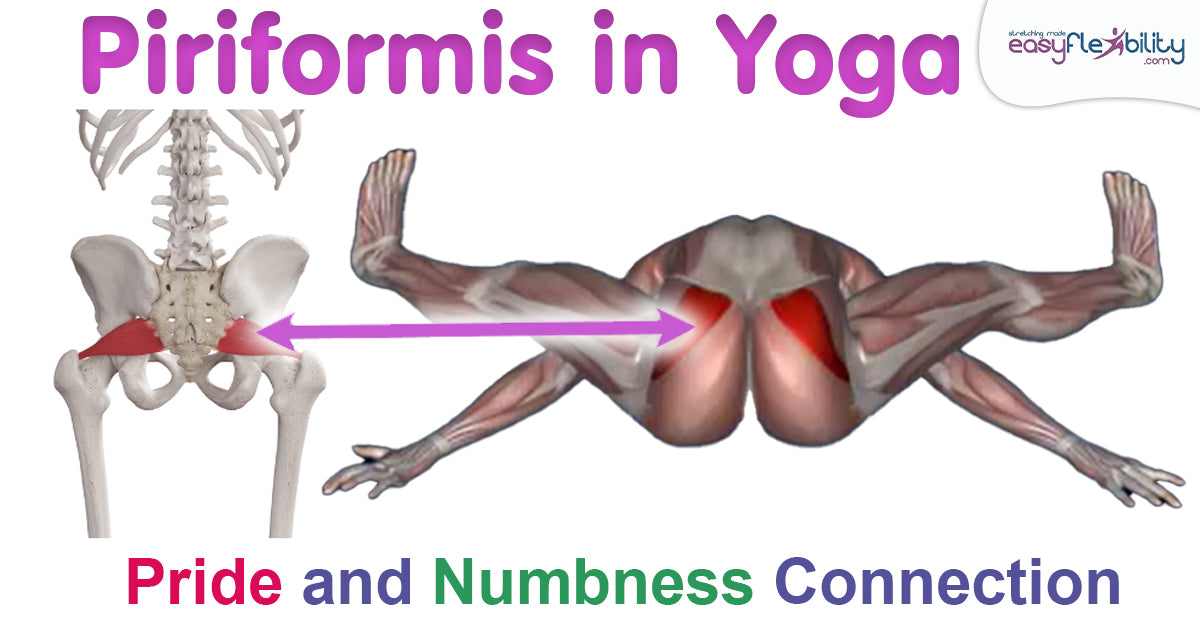
From Anatomy to Asana: Mastering Kurmasana (Pancake Pose) with a Focus on the Piriformis Muscle
Piriformis: Your Key to a Deeper, Safer Kurmasana Pose in Yoga
Yoga is not just a practice but a journey of discov...
Read More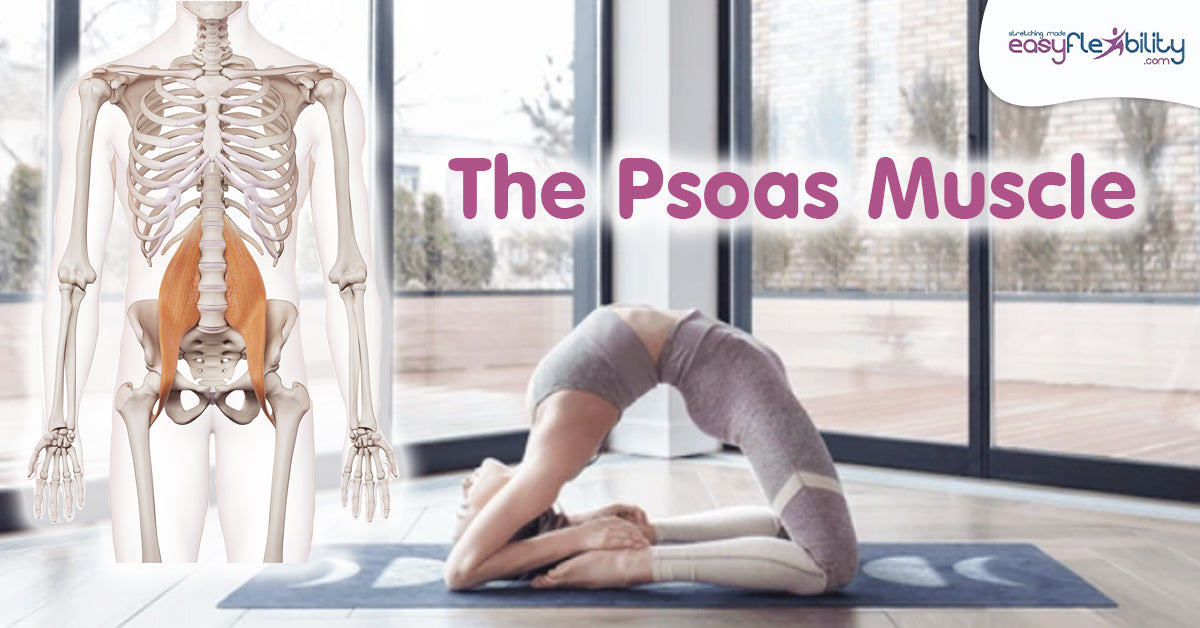
Unlocking the Secrets of the Psoas: Your Guide to Yoga Anatomy and Kapotasana
The Psoas: A Pillar of Yoga Anatomy
When it comes to yoga anatomy, one muscle that often captures the spotlight is...
Read More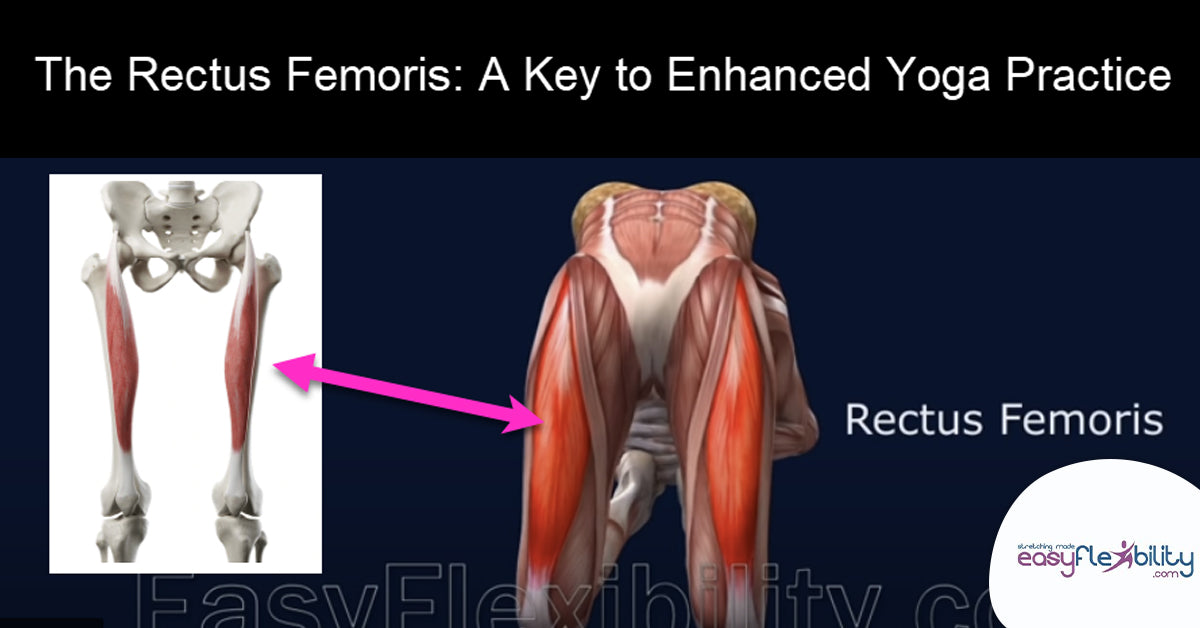
The Rectus Femoris: Yoga Anatomy - A Key to Enhanced Yoga Practice
The Rectus Femoris: A Key to Enhanced Yoga Practice
Yoga is not just a series of poses; it's a journey into the anat...
Read MoreHow to Do Compass Pose in Yoga
Have you ever felt lost and had to use your best judgment to find your way? Compass Pose, or Parvritta Surya Yantrasa...
Read MoreSlide Into Your Split: Mastering Hanumanasana
By now you have probably been working pretty diligently at getting better at your splits, or full Hanumanasa aka “Mon...
Read More